Friday, April 24, 2009

Live View can save you from wetting your pants!

Now I think I've just about exhausted the things Live View can do for you but I've got just a couple of more little tidbits.

Travel photography is a dirty, wet business. If you're not up to your ankles in mud you're up to your crotch in water. At least if you want to get a nice low angle you are. If you're happy to take all your photos at head height then you're probably nice and dry. :)

Now the problem with taking photos of creeks is that to get the best angle you're probably going to have to stand right in the middle of them.

And if you're using a wide-angle lens you want to ensure you have a foreground, middle ground and background to ensure you have that great 3-D effect.

Which means that you're going to want to get down nice and low to the water. Which also means that you're going to end up with wet pants as you stick your head down to look through the viewfinder. I've tried lots of different ways to avoid it but no matter how I work it I always come away with a nice photo but look like I've just had an accident of the most embarrassing kind.

Live View to the rescue! With the latest LCD screens we now have the ability to see the screen from a whole heap of different angles. No longer do we have to be directly behind the camera. We can see the screen from above, below, and off to the side. I've seen articles extolling the benefits of putting the camera up above your head and using the LCD to compose the shot.

I wasn't anywhere near as excited about being able to do that as I was being able to avoid wet underpants! Now I can stick my camera on a tripod placed a couple of inches above the water (and my ankles) and not have to lie down precariously to see what the shot looks like. I just flick on the screen and see my composition from near head height. Brilliant. Is there anything this little gadget can't do apart from tell me what to take photos of? My pants thank you. Have a great weekend.

Thursday, April 23, 2009

Depth of Field

Depth of field is, like many things in photography, a subjective thing. What's beautiful to one is horrible to another. But to get to the point where you can create art the way you want you need to have full control over your depth of field.

For those of you who are a bit shaky on the term, depth of field basically means what is sharp and what is blurry in the picture. For example in this image both the palm leaf and the Thai fishing boat are in focus. That is what we call a large depth of field. If either the palm tree or boat had been blurry we call that a shallow depth of field. If both are blurry we call that a crappy photographer! :)

Just how blurry or sharp you want to make foreground and background objects in your picture is controlled by your aperture. When you have a large aperture (f2.8, f3.5 etc) you will get a very shallow depth of field. You know the portraits where the eyes are in focus and everything else is blurry. That kind of effect.

When you want everything in focus, say in landscape photography, you would use a small aperture (f16, f22 etc). But what if you want something in between these two extremes?

Just what aperture exactly do you need to get the right amount of depth of field, or is it all a bit hit and miss? Well I'm happy to say it's definitely not hit and miss but you'll need a couple of features on your camera to help you.

When you look through the viewfinder of your camera it is always at its most wide open aperture. This is so the image you're looking at is nice and bright. If you have your aperture set at anything other than its widest setting, when you push the shutter button, while the viewfinder is blacked out, the aperture closes down to take the photo and then opens back up again. So looking through your viewfinder is no indication whatsoever of what the depth of field in your final picture is going to look like because you're always looking at an aperture of f3.5 say, or f2.8. Whatever your widest aperture is.

To see what your picture will look like at a smaller aperture you need to push a little button just underneath your lens. This button is called the depth of field preview button. Not all cameras have them but a lot of them do these days. When you push this button your lens aperture will suddenly close down and the viewfinder will get very dark indeed! It takes a little while for your eyes to get used to this new dark viewfinder but after you get used to it you will be able to see how much is blurry at that particular aperture setting.

To fine tune your depth of field you then open or close your aperture whilst pushing your depth of field preview button and you can see your background gradually get clearer or blurrier. At least this is how it works on the Canons. Some cameras don't let you change aperture whilst holding the depth of field preview button down. So you'll have to let go of the button, change your aperture and then push the button again. This is a great tool to really fine tune your depth of field and is invaluable in landscape photography. In fact every time I buy a new camera this is one feature that is a must on my list.

If you have Live View on your camera you can also use the depth of field preview button, which saves you looking through the viewfinder. The same principle applies. Change your aperture and then push the button and look at the differences.

If you don't have a depth of field preview button then the only other way is through trial and error. But at least with digital it's an instantaneous experiment. Take a shot and look at it on your LCD. Not enough depth of field? Close your aperture down more. Too much depth of field? Open your aperture up a bit more? It's a bit of a fiddly way of doing it but might be your only option.

In this day of auto-exposure, auto-focus, auto bloody everything cameras depth of field is one area where you can really take control of your images. So take yourself out of automatic mode and stick it into Aperture Priority and then play around with your depth of field button until you get to the stage where you really are controlling exactly what parts of your image are sharp and what parts are blurry.

Wednesday, April 22, 2009

Feel the motion

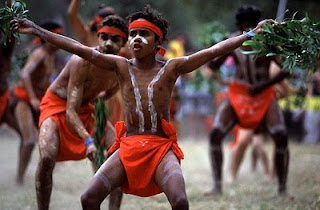
I love festivals. The light, the colour, the motion. It's this last element - the motion - that can often be the hardest to capture.

Too slow a shutter speed and everything is a big blur, too fast a shutter speed and you completely freeze the action, which makes it hard to tell whether something is moving or not.

The happy balance is to have a bit of movement (but not so much that it's all a big blur) while still retaining some frozen parts.

All sound a bit complicated? Well it's hard enough during the day, but just try it at night! To tell you the truth, I actually find it easier at night. But to make it easy for yourself you need to take control of your camera, move it out of auto-pilot and into manual mode.

First let's have a bit of a think about what our camera does at night when you use the flash in different modes. Now remember I shoot Canon but it will pretty much work the same, give or take a few minor differences, no matter what brand you shoot.

Firstly if you put your camera in one of the Automatic modes your camera will most likely default to around 1/60th second. That means that your flash will fire but because you have such a fast shutter speed (relative to how dark it is) that your background will be completely black. The shutter isn't open long enough for the background to be recorded. Not a good look.

So you think it might be better to put your camera into Aperture Priority mode, or maybe Night Portrait mode to ensure that your flash fires but the camera will take into consideration the ambient light and give you a long exposure. Sounds good in theory, but in practice you might find that because it's so dark you will get such a long exposure that everything is blurry. Too blurry to see what's going on.

So it's time to take control of your shutter speed and the best way to do that is to put your camera into Manual mode. I usually find that at a shutter speed of anywhere from 1/8th second to 1/15th second I can handhold a camera (with a wide-angle lens on it) pretty steady. I then experiment with my aperture to find a happy medium where I still have a pretty good depth of field but my background is nice and bright. For most situations around f5.6 to f8 works pretty well. This is assuming an ISO of 400.

So now that I have my ambient exposure set it's time to turn my flash on. No need to put your flash into Manual mode. Leave that in full TTL and let it do it's magic. I find that by aiming for a slight lull in really frenetic action I can pretty much freeze the motion of moving performers while still getting just a little bit of blur to show the movement.

Remember too that festivals at night are held under artificial lights which are usually a bright orange colour when they're recorded on your digital sensor (if it's on the Daylight setting). So stick that little piece of orange cellophane over your flash to get a more natural look.

Having your camera in Manual mode means that you're not constantly having to keep an eye on your shutter speed - it's already set. Your flash in TTL means that you don't have to worry about that because they're pretty much magic and get it right every time! So basically you have nothing to worry about except getting in the thick of the action and taking great photographs that capture the motion.

Tuesday, April 21, 2009

Some photo contests are thieves

Contests can be a great way to further your profile and get your name out there.

Apart from the great feeling it gives you from having one of your 'babies' acknowledged as being a nice photo, it can mean exposure to a lot of people who might like to see more of your work.

This photograph won me an award in 2004. It was the 2003 Australian Society of Travel Writers' Travel Photograph of the Year. A long name to be sure but it meant a lot of exposure and lead directly to a very lucrative photo assignment spanning over a couple of months.

But when entering photo contests you need to be sure of what you're signing away. At the end of the day all a photo contest organiser really needs is the right to use the winning photos to help promote their photo competition over the coming years and to show who won. That's it. Nothing more, nothing less. But many photo contest organisers use contests to build themselves a nice stock library of images so they will never have to pay for a professional photographer again - never.

Think about it. You organise a photo contest, throw in some nice prizes (which may or may not be donated) and then in the terms and conditions you throw in a clause which states that the copyright of every single photograph entered becomes yours. Kind of like entering your house in a beautiful homes competition and then handing over your house just by entering.

Why would you bother? Well the lure of having your photographs recognised is quite strong for many people but I would urge you to ignore photo contests that have these horrible clauses in them. Or better yet, write to the organisers to express your dismay. I know I do! Carolyn Wright is an attorney who often highlights bad photography competitions on her website.

So before you have dreams of hitting the big time by entering a photo contest, read the fine print and just make sure exactly what it is you're giving the organisers by entering.

Monday, April 20, 2009

Monday's Link

If you've ever fancied photographing for the hallowed pages of National Geographic (and let's face it who of us hasn't?) then head over here to find out what the editors are looking for. The current post is about Gerd Ludwig's amazing images of Russia. Take a look at some previous posts and you'll find out what the editor thinks is the difference between and amateur and professional photographer. Interesting reading.

Oh and you'll notice a new little widget over on the right hand side there. It's a link to my Photoshelter page where you can search for my images. So far I've only posted a few from Queensland and Japan but am exploring the possibility of using this great service to market my images.